
Getting Started
Getting Started with Last Second Coupon
Welcome to Last Second Coupon!
Last Second Coupon lets you show a timely discount offer to shoppers right when they’re deciding whether to buy. This guide walks through creating a complete campaign step by step, using a cart-page coupon popup as the running example, so you can follow the same path for your own first campaign.
Step 1: Choose Your Campaign Type
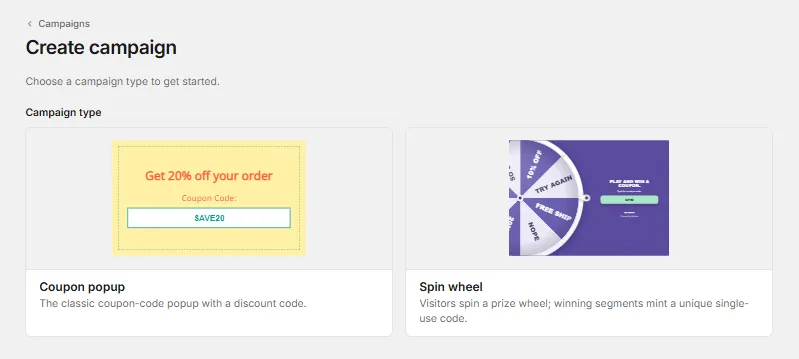
Every campaign starts by picking a type. Coupon popup is the classic option: a simple popup window that reveals a discount code to the shopper. Spin wheel turns the same idea into a small game, letting visitors spin for a prize instead of just seeing a code. For something quick and low-friction, Coupon popup is the one to reach for.
Step 2: Pick a Seasonal Template
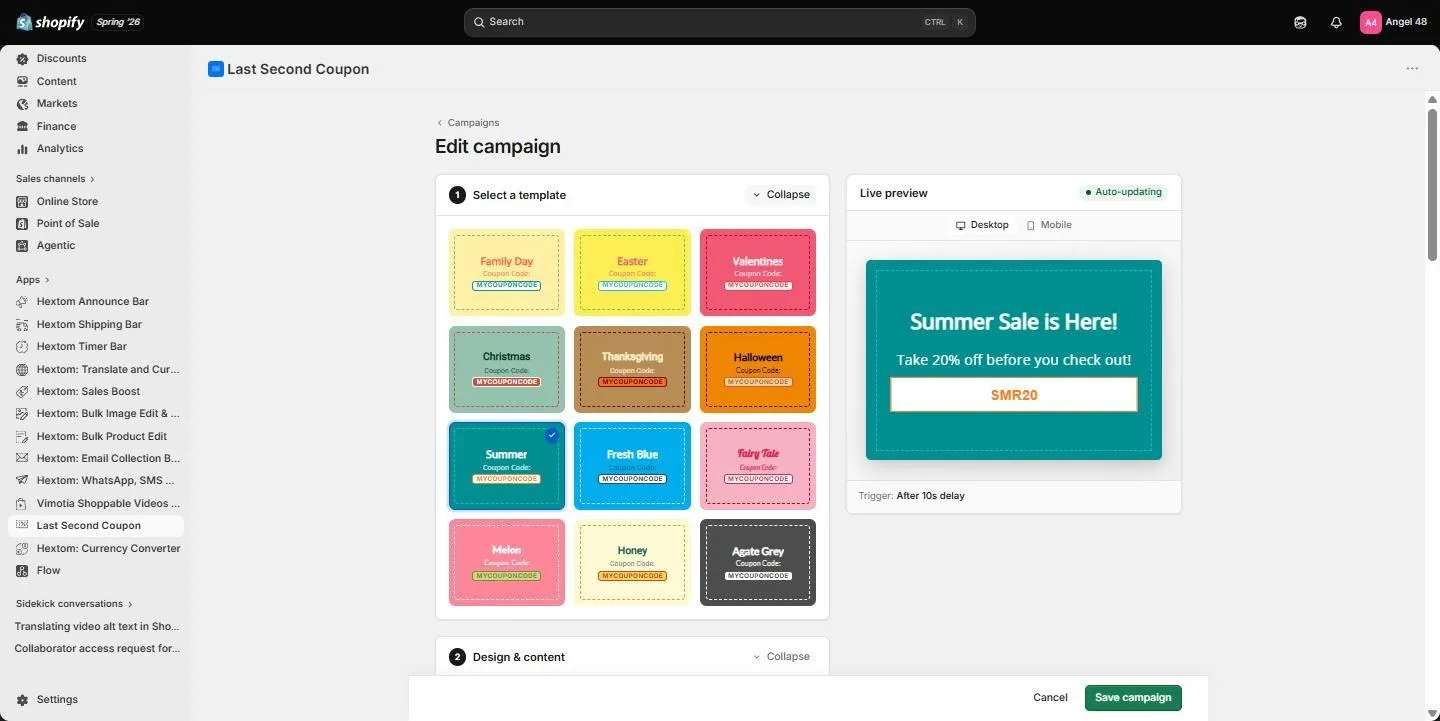
After selecting a campaign type, a gallery of templates opens up. Each one is pre-styled around a season or occasion, from Easter and Valentines to Halloween and Christmas, alongside more neutral options like Fresh Blue and Agate Grey. Choosing a template instantly sets the colors and mood of the popup, and everything can still be adjusted afterward. For a summer promotion, the Summer template is the obvious starting point, with its bright teal backdrop and warm highlight color.
Step 3: Write Your Content
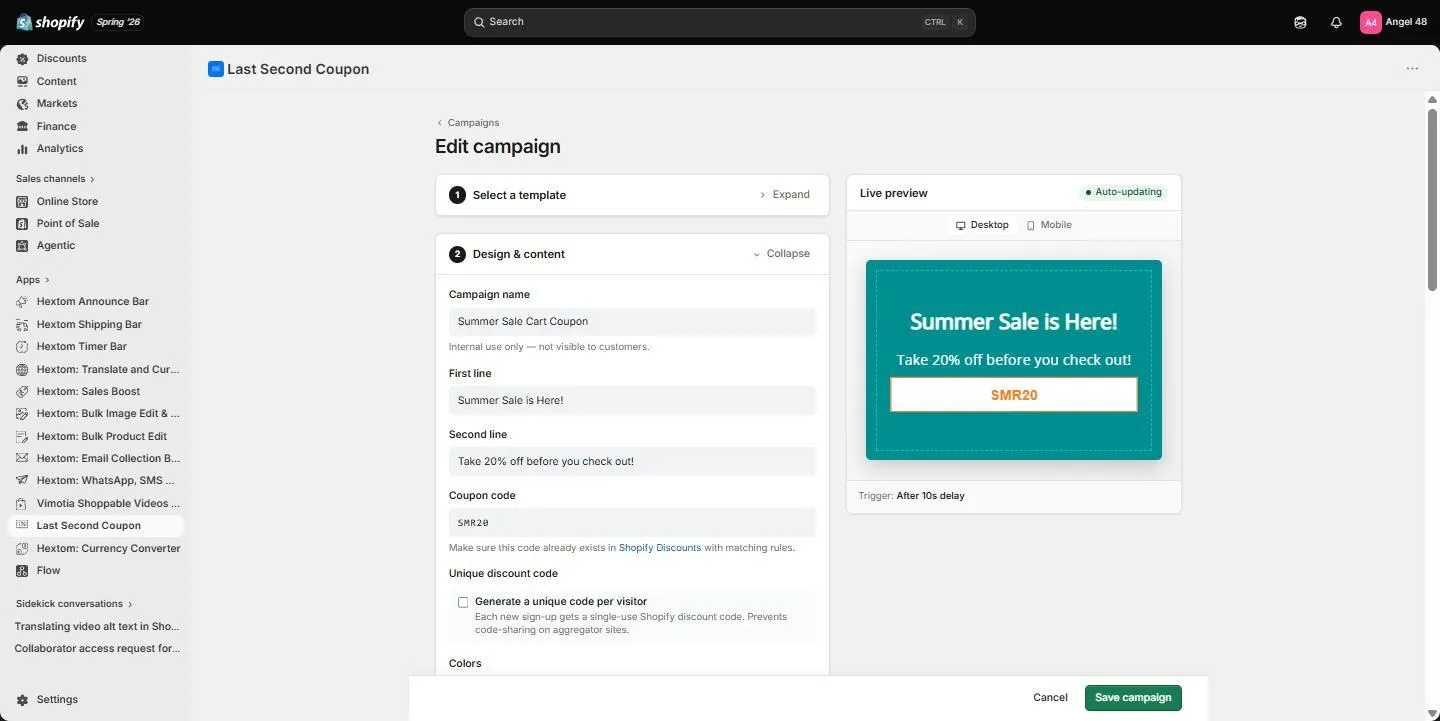
With a template in place, the Design & content section becomes the focus. Four fields control what shoppers actually read: the campaign name, which is an internal label customers never see; the first line, the main headline; the second line, a supporting message; and the coupon code itself. Together these turn a generic template into a specific offer, for example pairing a headline like “Summer Sale is Here!” with a supporting line about a percentage off and a matching code.
Step 4: Set Your Display Rules
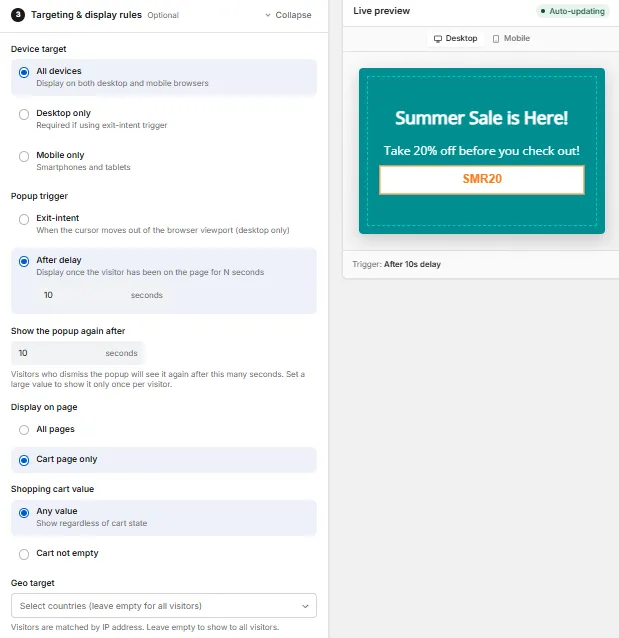
The Targeting & display rules section decides who sees the popup, and when. Device targeting can restrict a campaign to desktop or mobile only, or leave it open to both. The popup trigger controls the moment it appears, either after a delay of a chosen number of seconds or when a visitor’s cursor signals they’re about to leave. Most usefully, the display page setting can limit a campaign to a single page type, such as showing it only on the cart page rather than site-wide, keeping the offer focused on shoppers who already have something in their basket.
Step 5: Save and Review
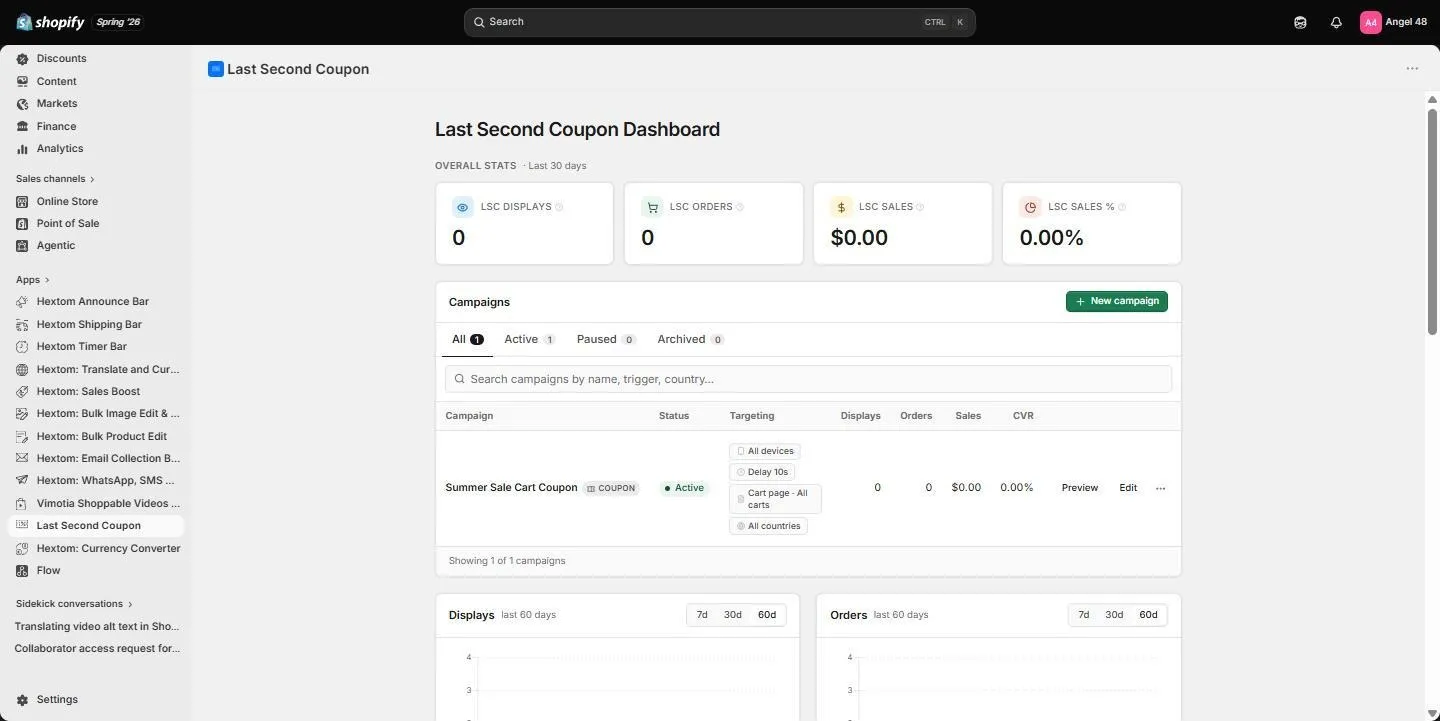
The live preview panel updates in real time as each setting changes, so it’s worth checking it after every edit rather than only at the end. Once everything looks right, saving the campaign returns you to the dashboard, where it appears in the campaign list with its status, targeting summary, and performance stats, all starting at zero until it begins running.
A Note on Discount Codes
A popup can only ever display a code, it can’t create one. Before a coupon campaign goes live, the same code needs to exist as an active discount in Shopify’s own Discounts section, with matching rules such as percentage and minimum spend. Skipping this step means shoppers will see a code that doesn’t actually work at checkout.
That’s the full path from a blank campaign to a live, seasonally themed coupon popup. Questions about anything not covered here can be sent to help@hextom.com.