
Getting Started
Getting Started with Multi Currency Converter
Welcome to Hextom: Currency Converter!
Currency Converter automatically displays your store’s prices in your visitors’ local currencies, helping international shoppers understand pricing at a glance without doing any manual conversion themselves. This guide will walk you through setting up the app for the first time.
Currency Converter Basics
Please note that the item price on the checkout page cannot be converted — Shopify always uses your store’s base currency at checkout. The Multi Currency Converter only affects displayed prices on the storefront (e.g., product and cart pages).
Step 1: Complete the required setup in Shopify Admin
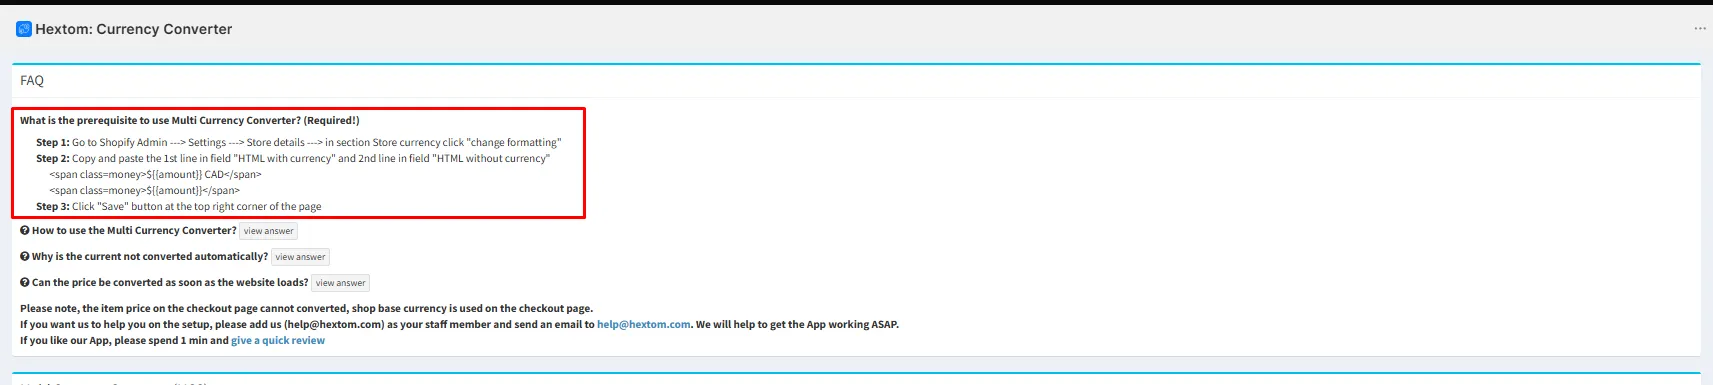
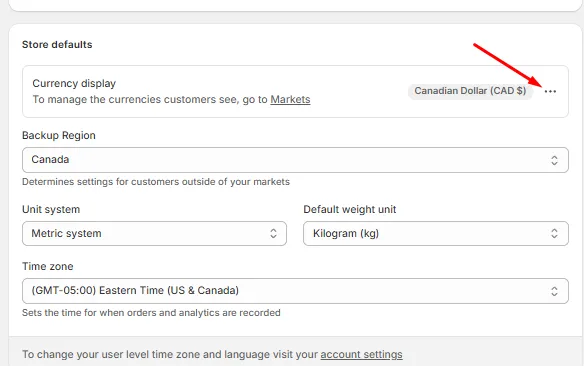
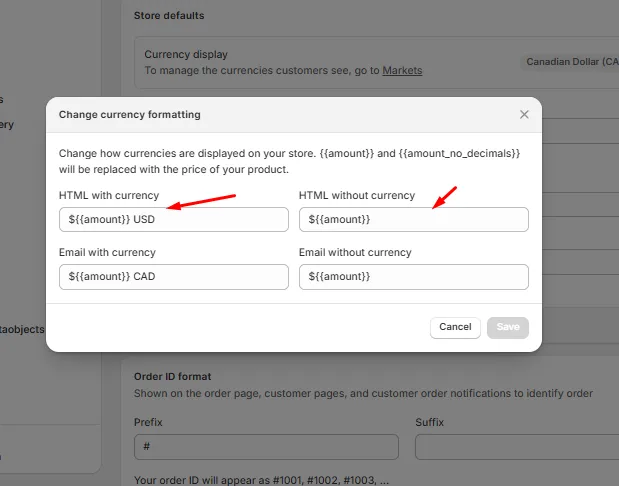
Before turning on Currency Converter, go to Shopify Admin, then Settings, then General. In the “Store defaults” section, click the ”…” next to Currency display and choose “Change currency formatting.” Copy the HTML formats provided in the app’s FAQ section into the “HTML with currency” and “HTML without currency” fields, then click Save. This step is required for the app to work correctly.
The HTML formats to copy are shown in the app’s FAQ section:
In your Shopify Admin, under Store defaults, click the ”…” next to Currency display:
Then choose “Change currency formatting” and paste the HTML into the HTML with currency and HTML without currency fields:
Step 2: Turn on Multi Currency Converter
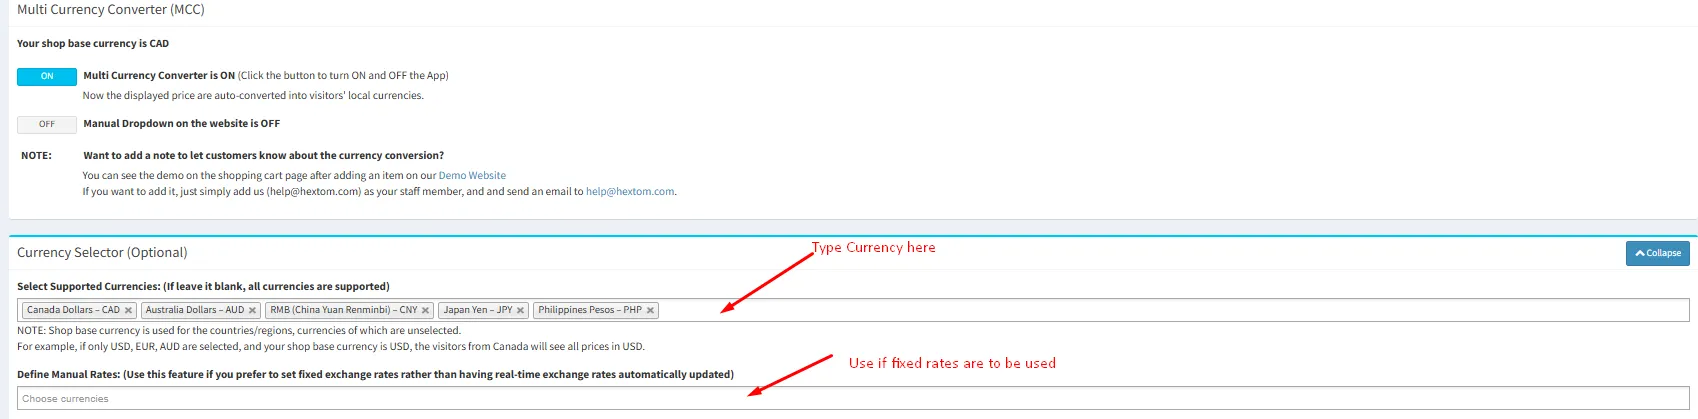
From the app dashboard, toggle “Multi Currency Converter” to ON. Once enabled, prices displayed on your storefront will automatically convert into each visitor’s local currency based on their location.
Optional Step: Enable the manual dropdown
If you’d like to give visitors control over which currency they view prices in, toggle on “Manual Dropdown on the website” to add a currency selector to your storefront.
Step 3: Choose which currencies to support
Under “Currency Selector,” use “Select Supported Currencies” to choose which currencies your store supports. If left blank, all currencies are supported. If you select specific currencies only, visitors from unselected regions will see prices in your shop’s base currency instead.
Optional Step: Set manual exchange rates
If you’d prefer fixed conversion rates instead of automatically updated real-time rates, use “Define Manual Rates” to set your own rate for each currency.

Step 4: Configure format and rounding preferences
Under “Format Configurations,” choose whether prices display with or without a currency code (e.g., “$100 USD” vs. “$100”), and pick a rounding method for converted prices: no rounding, rounding to the nearest whole number, or rounding to end in .99.
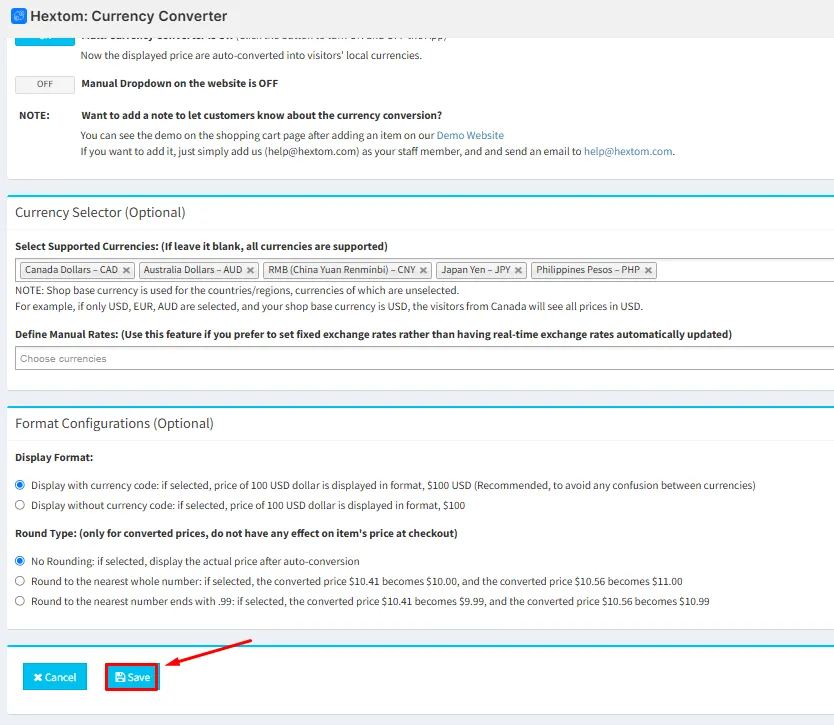
Step 5: Click “Save”
Once you’re happy with your settings, click “Save” at the bottom of the page to apply your changes, as shown in the screenshot above.
What if prices aren’t converting automatically?
Double-check that Step 1 (the required Shopify Admin formatting setup) was completed correctly, and confirm the Multi Currency Converter toggle is set to ON.
If you have any questions or concerns, please feel free to reach out to us at help@hextom.com.