
Getting Started
Getting started with Hextom Quick Announcement Bar •
Welcome to the Quick Announcement Bar!
Always keeping your customers in the loop about your business updates, promotions, and events is a key element of managing customer relationships. Quick Announcement Bar makes this quick and easy. You can add a fully customizable banner to your website with a few clicks. Multiple bars can be created and set to rotate or be targeted to different markets, allowing you to localize your promotional messaging!
Creating a Quick Announcement Bar
There are a lot of features that you may want to use… but to quickly setup a new bar, follow these steps:
1. Enable the App Extension (Recommended)
We recommend enabling the Quick Announcement Bar app embed on your Shopify Online Store 2.0 theme — it helps the bar load faster, and it’s required if you want to display the bar only for specific products or customers. See our how to enable app embed guide for the full steps.

2. Click the Create New Bar button

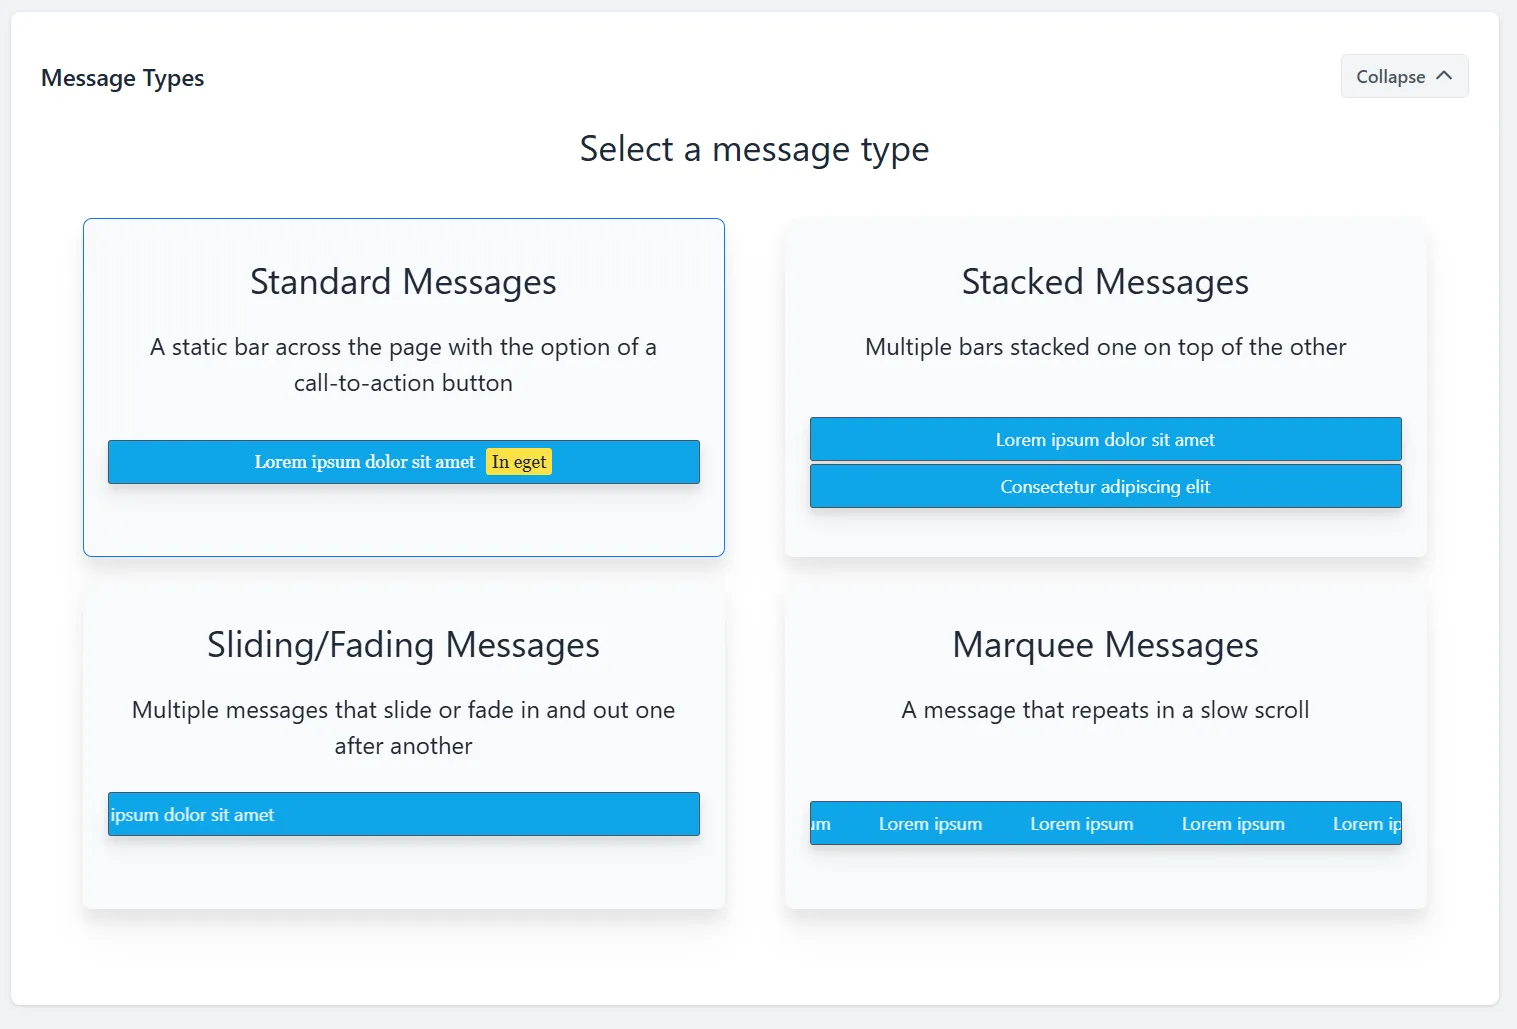
3. Select a message type
You can select the message type for the bars. Our app supports 4 types of bars, Standard, Stacked, Sliding, and Marquee.
4. Select a template
Once you select a template, you will see a preview of how it will look on your website.

5. Configure the content
There are many configuration options offered in the app. To get started quickly, you need to ensure that the following options are configured.
- Message: The message that will appear on the bar in the shop.

- Call to Action: By default, the bar does not add a call to action. You can set one up with the following dropdown:
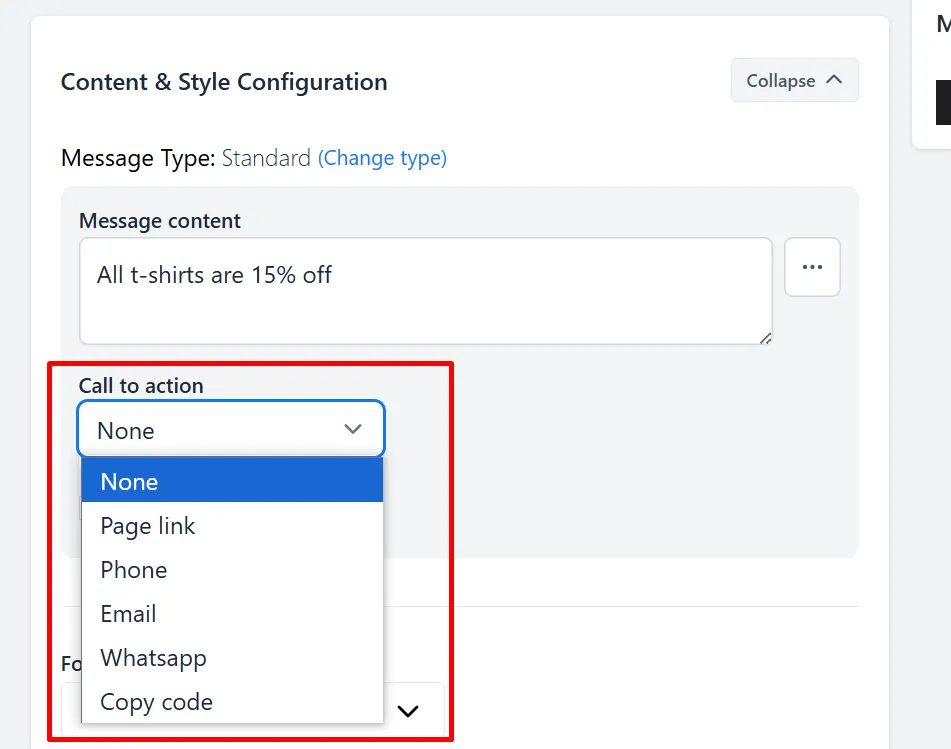
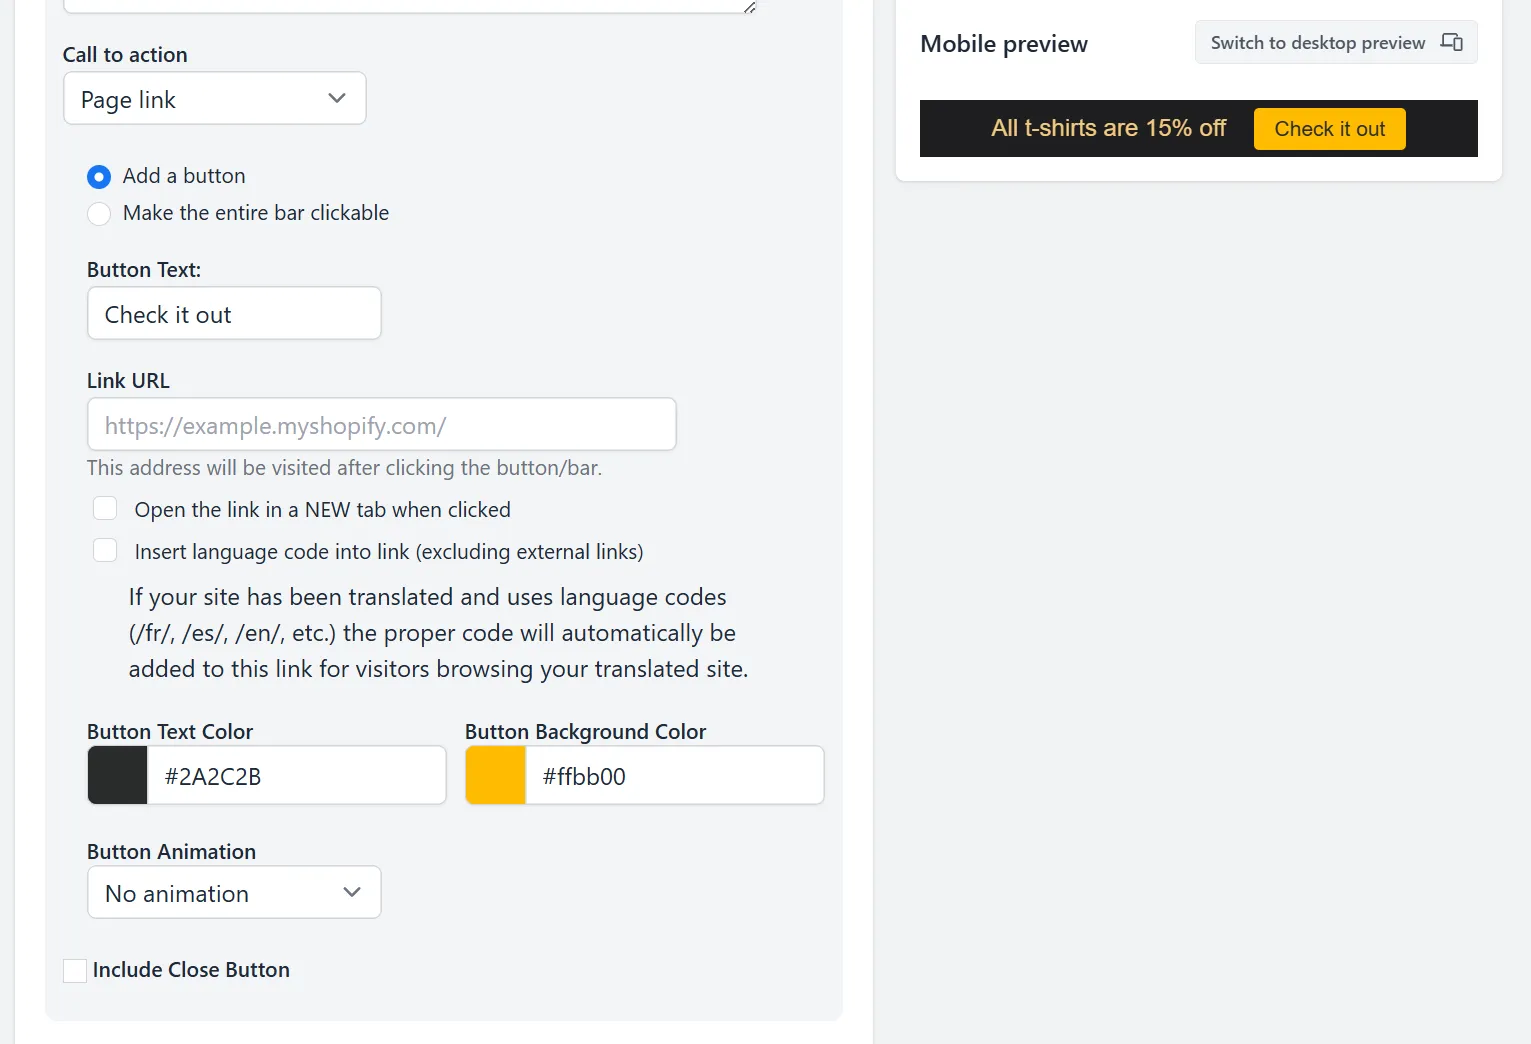
For example, you can add a clickable link to the bar with the Page Link setting. From there, you can configure the bar to have a button, or to make the entire bar clickable, as well as controls for how the page opens when the bar is clicked.
6. Save your bar
There are many other settings that you can configure, but for now, scroll all the way to the bottom and click Save and publish.

The bar will now appear at the top of your store’s pages.

Making changes to your bar
Now that you have created a bar, you can edit it. To do so, go back to the app’s dashboard and click on the Edit button in the row of the bar you’d like to edit.

The bar’s configurations will open up. You can make any edits you need, and then save your bar. When the page in your store is refreshed, the bar’s changes will be applied.
There’s a lot more to explore!
Want to explore more advanced features? Check out our guides on message types, translations, custom placements, targeting your bar to specific pages or devices, products, and customers, and adding custom code!
If you have any questions or concerns, please feel free to reach out to us at help@hextom.com.